Creating CDs with Roxio Easy CD Creator 5
All of the cluster Dell and Omnitech
computers have the capability for an individual to create his or her own data
or music CDs. Creating CDs (or "burning") has never been easier, and can
be done from any of computer classrooms or labs on campus. Following this
brief introduction are some easy steps for creating your own CDs!
First things first - an explanation of the different
types of writeable CDs.
There are two different types of writeable CDs: CD-R and CD-RW.
CD-R CDs allow you to write to them only once, but you can read from the CDs
over and over again. CD-RW CDs allow you to rewrite on the CD many times,
as well as read from them an unlimited number of times. Both types of CDs
can be used with Easy CD Creator 5, just make sure that you don't write to a
CD-R more than once!
How do I create a CD using Easy CD Creator 5?
- First,
you need to launch Easy CD Creator 5.Ę
Click on Start, go to All Programs, and then go to Easy CD Creator 5.Ę From this folder, select the option
called Project Selector, and
then move your mouse over the button next to make a data CD, so that the screen below appears.
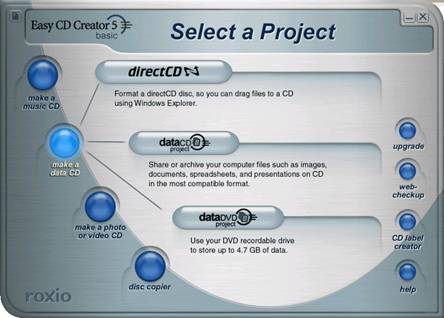
- Click
on data CD project, so that you
get the screen below.
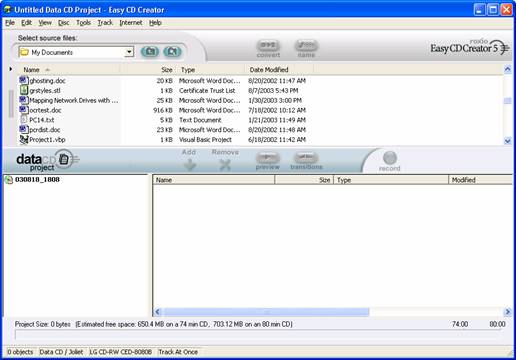
- The
drop-down box labeled Select source
files has a list of all the drives located on your computer, and all
the files in the first level of that drive are displayed in the top
explorer window. Go to the drive and the location where the data you
want to put on the CD is located. In this example, the data is
located on my H: drive, in my My Documents
folder.
- Highlight
the files in the explorer window that you would like copied onto your
CD. You can highlight all of the files in a folder by clicking on
the first file in the upper right window, holding down the Shift key, and then clicking on
the last file. You can also select files by holding down the Ctrl key, and clicking on the
files you want to select. Then click on the Add button to add your selected files to the CD layout, as
shown below:

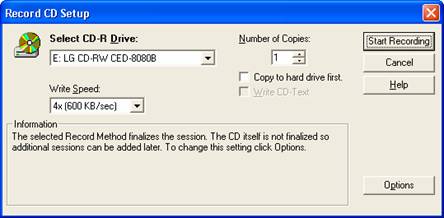
- When
you are finished adding files to your CD, you can start creating the CD by
clicking on the red Record
button. A box titled Record CD Setup will then appear,
like the screen below, and you then click on the Start Recording button to start "burning" your CD.
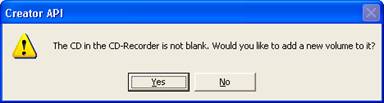
Note: If you are using a CD-RW that you have used
before, a screen like the one below will appear. Click on Yes
to continue.
- Easy
CD Creator 5 will then test the file transfer rate on your computer.
After that is finished, the software
will start copying data onto your CD.

- When
Easy CD Creator 5 has completed copying files onto your CD, click on OK to continue. If a screen asking you to save a file
appears, click on No to go back
to the explorer window. Then exit
out of the explorer window, and out of the Select a Project screen, and you have successfully created a
CD using Roxio Easy CD Creator 5.