Site Category - for new pages, start with ‘xxx unpublished’ and move to ‘xxx’ when page is ready to go live (use up/down arrow key inside dropdown for faster navigation)
Body:
Format list - only use h2 - h6, regular text/paragraph use default ‘normal’
Table - set width to 100%, do not drag table border in editor. Set cell width in percentage if needed (right click in cell, go to ‘Cell’ → ’Cell Properties’).
Image upload is discussed in a separate document below.
Leave as is: block placer, header image, dept reference tag, meta tags.
Academic department users: keep URL path checked for ‘Generate automatic URL alias’. Other users uncheck it and specify page URL following the department’s current URL pattern.
Image upload:
Prepare your image: Image’s minimum width is 543px, and you need a 624px wide image if you intend to use it as a full-width image.
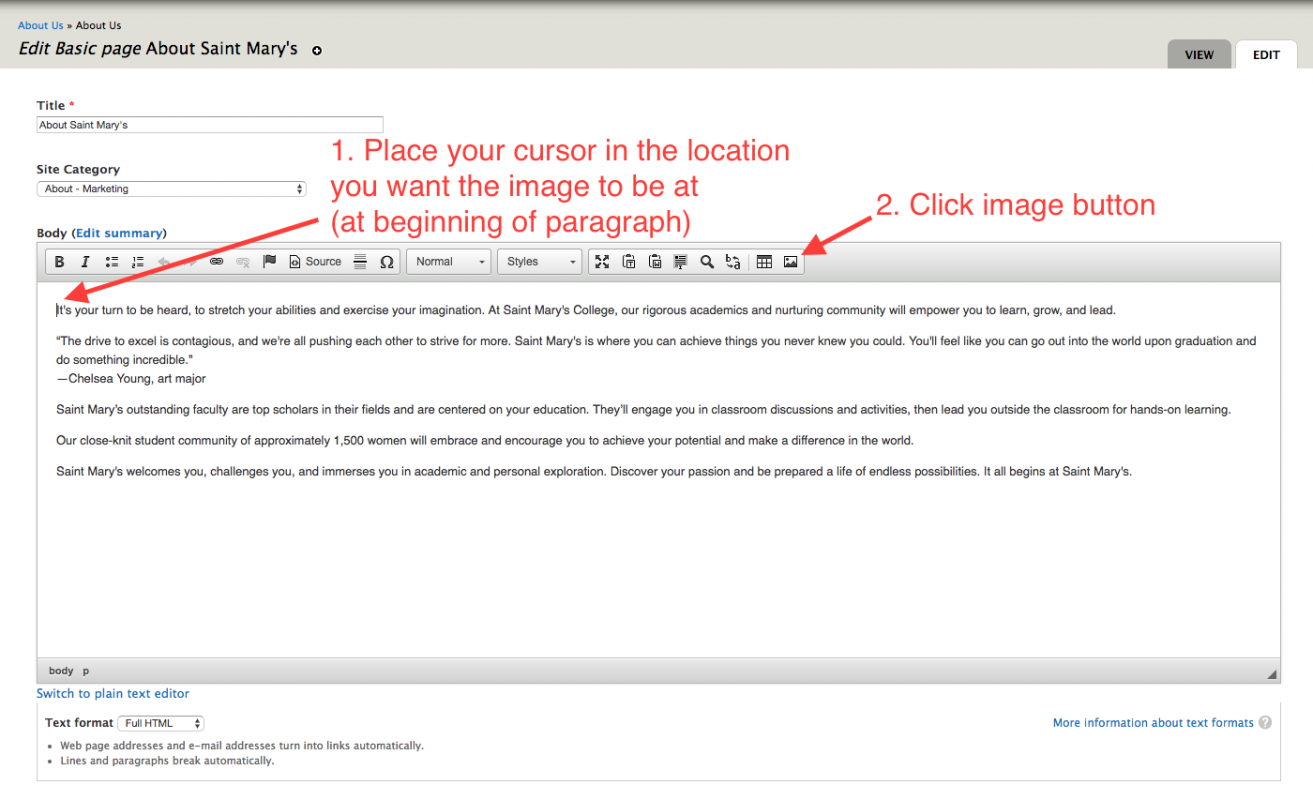
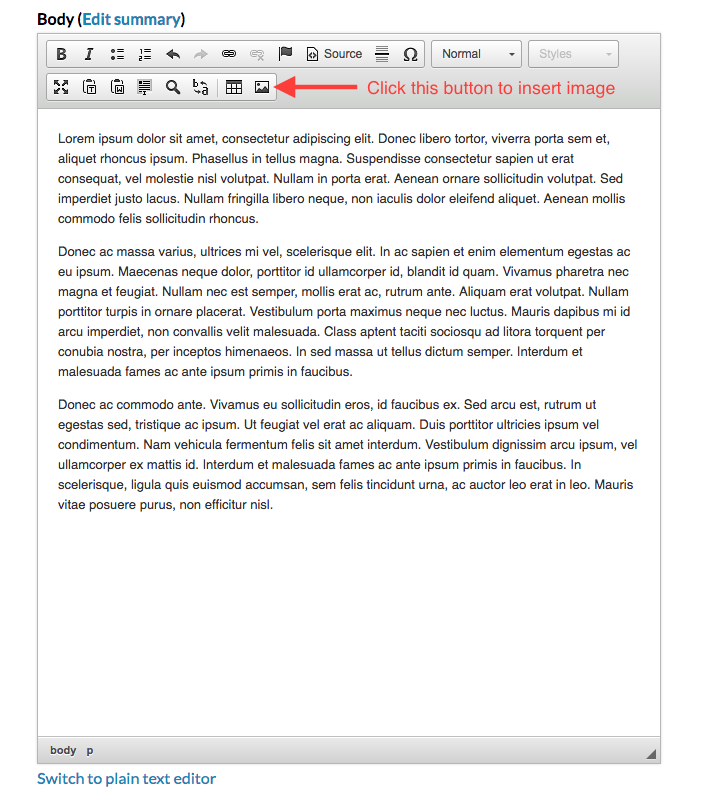
Edit the page: Place your cursor in the location you want the image to be at (at beginning of paragraph) and click image button.
Click on the image button to start the uploading process
Click ‘Browse Server’ to open the upload window
Choose between files already uploaded, or upload a new file
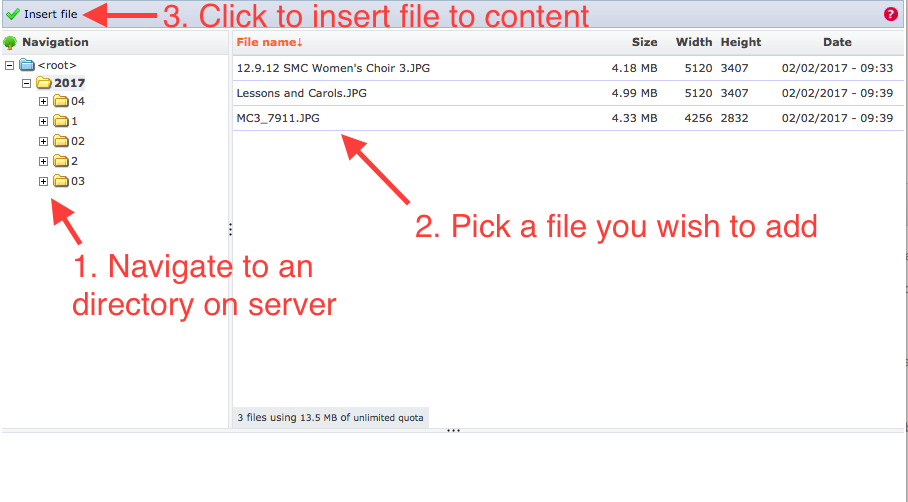
Choosing files already uploaded:
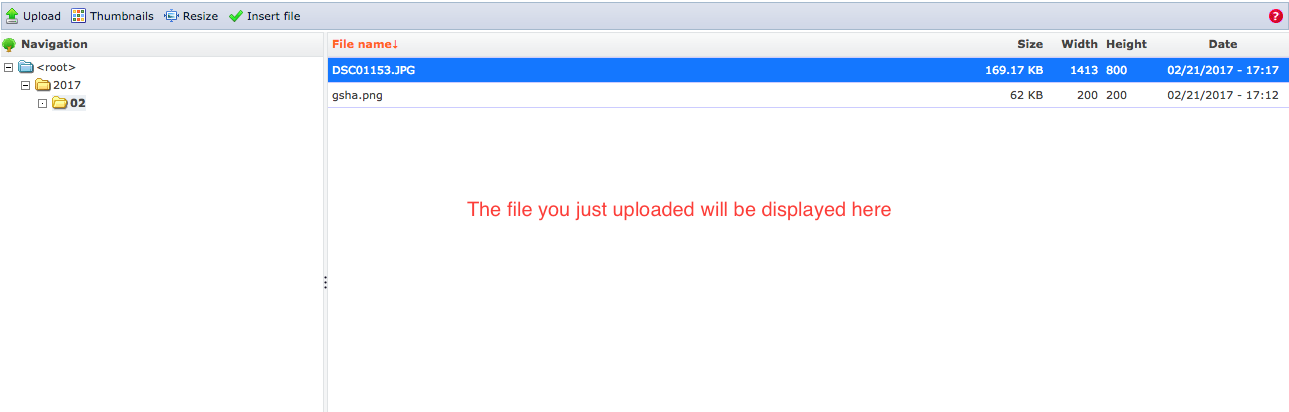
Click the directory icons on the left. All files in that directory will be displayed on the right.
Click to select the file you wish to insert
Click the ‘insert file’ icon on the top left
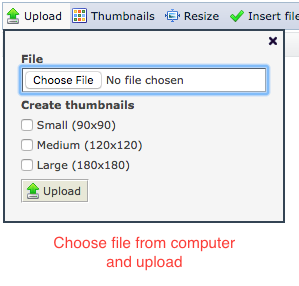
Upload new file:
First, make sure you are in the current directory, you can only upload files to the current directory. Directories are named in MM format under each year. So for the date April 3, 2017, you should navigate to a directory called ‘2017’ (year), then under it, go to ‘04’ (month).
Click ‘upload’ button to start the upload proces
Click ‘Choose File’ to upload file from your computer. We ask our users to upload images with a minimum width of 543 pixels. And we will run an image size check during the upload process, any images that fail the check will not be uploaded.
After image has been uploaded, it will show up with other uploaded files on server in this list. Go ahead and select the image you want to upload, and double click to insert it to the page.
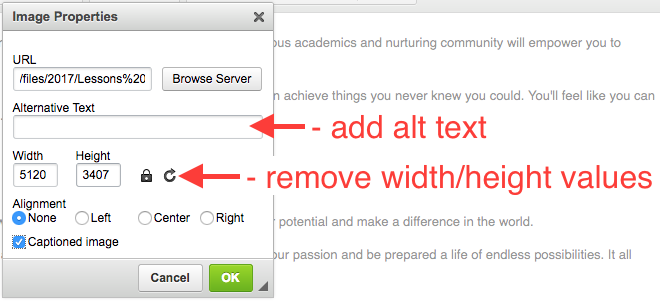
In the ‘Image Property’ window,
Add alternative text (this should be descriptive of what is in the image, but only if the image is integral to understanding the content on the page).
Delete both Width and Height values
Set alignment (left, right, center, or none)
Check caption box if the image needs a caption
Note: Image’s display width will be set in next step.
Select Image width style: Click on the image, then click ‘Style’ dropdown list and select a span number for the image. Here’s how you interpret the span numbers:
span_3 = 25% width of the content
span_4 = 33%
span_6 = 50%
span_12 = 100% (full width, also make sure you set alignment to ‘None’ for a full width image)
To remove the span from image, click on image, then click on ‘Style’ dropdown. Now you should see a previously activated span with a grey background span_6). Go ahead and click span_6 again to remove this style.
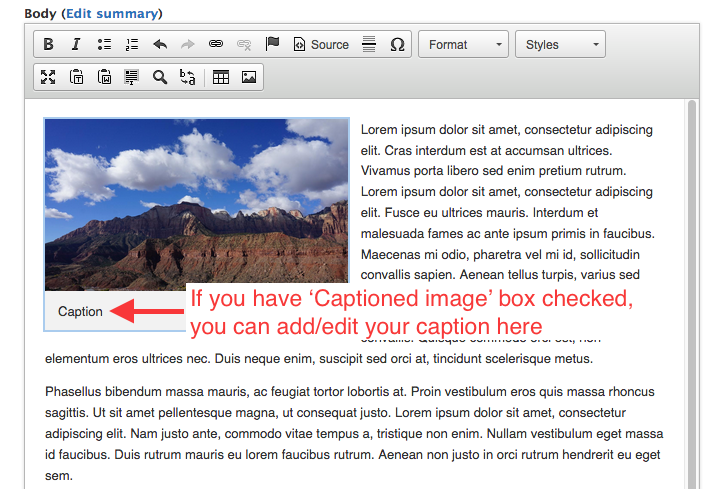
If you checked ‘Captioned image’ in step 8, you can now add or edit your caption now.